cuvette Install
A harness for AI in lab data analysis · Early release

Analyze your data with the software you already trust.

An agent harness for data analysis.

$curl -fsSL https://cuvette.ai/install.sh | sh
Download for Mac

Type this command in the Terminal app on macOS or Linux. It needs Node.js 22, a free program. Then type cuvette app to open Cuvette in your browser. For Windows, see Install.

A INPUT DATAImages.tif .cziReads.bam .fastqSpectra.imzML .mzMLTables.csv .xlsxYouapprove each decisionB CUVETTEcuvettethe harness around your modelaQuestionsbProposed metricscDemonstration on a sampledConfirmEach step logged · Each number checkedC PROGRAMSImageJImagingOpenMSMass spectrometrysamtoolsGenomicsIQ-TREEPhylogeneticsMNE-PythonNeuroscienceMDAnalysisStructural biologyRDKitChemistrylme4StatisticsveganEcologyastropyAstronomyGDALGeospatial+ 50 more adaptersAnswer and record.eln file · protocol Data goes into Cuvette. Cuvette runs programs from many fields. You approve each decision. The answer and the record come out. A INPUT DATA B CUVETTE C PROGRAMS Images.tif .cziReads.bam .fastqSpectra.imzML .mzMLTables.csv .xlsx cuvette the harness around your model aQuestionsbProposed metricscDemonstration on a sampledConfirm Each step logged Each number checked ImageJImagingOpenMSMass spectrometrysamtoolsGenomicsIQ-TREEPhylogeneticsMNE-PythonNeuroscienceMDAnalysisStructural biologyRDKitChemistrylme4StatisticsveganEcologyastropyAstronomyGDALGeospatial Answer and record .eln file · protocol You approve each decision + 50 more adapters
Fig. 1 | How a question moves through Cuvette. A, Your data stay in their folder. B, The harness takes the model through four steps, and you approve each decision. C, Cuvette runs programs that scientists already use. An adapter tells Cuvette how to run one program. The figure shows one program from each field. The answer and the record come out as an electronic lab notebook (.eln) file or a protocol.

How a session works

Work with your data and your analysis programs in plain language.

Ask a question in your own words. The harness turns it into steps in real programs, and you approve the method. Each session has the same four steps. Pick a field to see an example.

a
Questions

The model asks before it guesses.

It reads your files and your question. Then it asks a few short questions about your experiment.

Each question shows the recommended answer and the reason for it.

plate-03 · 96 images
Question 1 of 3
Which channel shows the nuclei?

Recommended: DAPI. The file names end in w1, and channel 1 has the stain.

DAPI channel 1
GFP channel 2
Both channels
bone-marrow · 2 samples
Question 1 of 4
Which cells do you keep?

Recommended: at least 200 genes and at most 10% mitochondrial reads. The paper uses these cutoffs.

200 genes, 10% mitochondrial from the paper
500 genes, 5% mitochondrial stricter
Keep all cells
mouse-a2 · 3 sections
Question 2 of 3
How do you normalize each pixel?

Recommended: TIC, the total ion current. It is the default in the vignette.

TIC total ion current
RMS root mean square
No normalization
Magnetoencephalography (MEG) · 1 recording
Question 3 of 4
Which time window do you measure?

Recommended: 80 to 120 ms after the tone. The N100 peak falls in this window.

80 to 120 ms around the N100
50 to 150 ms wider
The whole epoch
b
Proposed metrics

You see the method in plain words.

The model writes what it will measure and how. Each setting that can change a result is on the list.

You change any line, or you approve the list.

Proposed metrics, version 1
1
Nucleus count for each imageObjects in the DAPI channel
2
Threshold: Otsu, globalOne threshold for each image
3
Remove objects under 30 pixelsDebris and noise
4
Keep nuclei at the image edgeYour answer to question 3
Change a lineShow me on a sample
Proposed metrics, version 1
1
Remove cells with fewer than 200 genesEmpty droplets and broken cells
2
Remove cells with more than 10% mitochondrial readsDying cells
3
Normalize each cell, then log transformSame total count for each cell
4
Clusters and their marker genesNeighbor graph, then Leiden clusters
Change a lineShow me on a sample
Proposed metrics, version 1
1
Normalize each pixel to its TICTotal ion current
2
Pick peaks, then align them across pixelsOne peak list for the section
3
Segment the tissue into regionsSpatial shrunken centroids
4
Mean intensity of each peak in each regionOne table for each section
Change a lineShow me on a sample
Proposed metrics, version 1
1
Epochs from 0.2 s before to 0.5 s after each toneOne epoch for each event
2
Baseline: from the start of the epoch to the toneThe tutorial default
3
Leave out the channels that the file marks as badTwo channels
4
Peak amplitude in the N100 windowFor each condition
Change a lineShow me on a sample
c
Demonstration on a sample

It runs on one sample first.

The method runs on one sample only. You look at the result before the other samples run.

If the result looks wrong, try another sample or change the metrics.

Demonstration on a sample · A01_s1
123456789101112131415161718192021222324Histogram (log)01pixel intensityOtsuDAPI · channel 1outlinecentroid20 µm24 nuclei in the drawing
Confirm and run allTry another sample
Demonstration on a sample · pulse
200 genes10%01020301001,000genes per cell (log scale)mitochondrial %keptremovedn = 510Green dots: 393 of 510 cells kept in the drawing
Confirm and run allTry another sample
Demonstration on a sample · section s1
123m/z 760.6 · TIC normalized10.50relativeregion700750800850 m/z734.6798.5826.6760.6Mean spectrum3 regions in the drawing
Confirm and run allTry another sample
Demonstration on a sample · left auditory
N100tonemean, left auditory sensors−2000200fT−200−1000100200300400500time after tone (ms)field at 100 ms27 sensorsShaded: the N100 window, 80–120 ms
Confirm and run allTry another sample
d
Confirm

Then the batch runs, and the record stays.

After you confirm, the method runs on all samples. Each number in the answer must match a result in the session record.

Export the session as an electronic lab notebook (.eln) file, or as a protocol for a lab member.

Confirmed version 1
Running on 96 images
  • Method confirmed by you
  • Each step logged with its inputs
  • Each number checked against the record
  • Export: .eln notebook file or protocol
Confirmed version 1
Running on 2 samples
  • Method confirmed by you
  • Each step logged with its inputs
  • Each number checked against the record
  • Export: .eln notebook file or protocol
Confirmed version 1
Running on 3 sections
  • Method confirmed by you
  • Each step logged with its inputs
  • Each number checked against the record
  • Export: .eln notebook file or protocol
Confirmed version 1
Running on 4 conditions
  • Method confirmed by you
  • Each step logged with its inputs
  • Each number checked against the record
  • Export: .eln notebook file or protocol

Fig. 2 | The four steps of a session. a, Questions. b, Proposed metrics. c, Demonstration on a sample. d, Confirm. The panels are drawings of the app screens. Each example uses the decisions of a case from the validation set. The data in panel c are drawings, not results.

Programs

One harness. Your choice of AI model. 61 programs and growing.

Use Claude from Anthropic, a model that runs on your own computer, or any model server that uses the OpenAI format. An adapter connects the harness to one program. Pick a field to see its programs. Other people can write and share adapters: see community adapters.

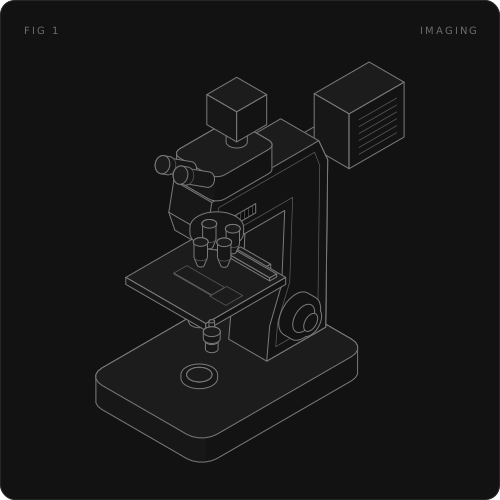
Plate I | Imaging. Count and measure cells, nuclei and tissue in microscope images.

    See the imaging adapters

    Records

    Data provenance, built for peer review.

    A reviewer can trace each number back to the step and the file that made it. These rules are code that runs on each step. They are not instructions to the model.

    You make the decisions

    Each adapter lists the choices that can change a result. If a step needs a choice that you did not make, the step stops. The harness compares the options, then asks you.

    You can repeat each step by hand

    Each step shows the command or the menu path with its dialog values. Type /export protocol to write the steps as a protocol.

    Every step goes in one record

    Cuvette adds to the session record and never deletes from it. Each result keeps its settings and the fingerprints of its input and output files. If you change a decision, Cuvette marks the old results as out of date.

    Each number has a source

    Each number in the answer must match a result in the session record. A second model reads only the session record and checks the answer. The model must correct each error before you see it.

    Validation

    We repeat published analyses and compare the numbers.

    The model gets the data and the question from a paper or an official tutorial. Then we compare its answers with the known values.

    53

    published analyses: 33 research papers and 20 tutorials or software test sets

    472

    known values that we score

    3

    Claude models in the final run: Opus, Sonnet and Haiku, three blind runs each

    Where the 472 known values come from

    472known values
    Printed in the paper27658%
    Printed in an official tutorial5111%
    Calculated by us with a different program13328%
    Calculated by us with the same program123%

    The chart shows sources, not scores.

    The source of each value is in the sources document. See the validation method and each paper.

    Install

    Two ways to start.

    The terminal is the window where you type commands. Use it if Node.js is on your computer. Node.js is a free program that runs Cuvette. If you do not have it, use the desktop app.

    Terminal

    For macOS, Linux and Windows. Cuvette needs Node.js 22 or later.

    1. Install Cuvette. npm, the installer that comes with Node.js, downloads it.
      npm i -g @elparko/cuvette
    2. Check your computer. This command finds the programs and models that Cuvette can use.
      cuvette doctor
    3. Open the app in your browser.
      cuvette app

    Desktop app

    For macOS. One .dmg file, the Mac installer. You do not need the terminal.

    1. Download the .dmg file and drag Cuvette to Applications.
    2. Open it the first time. Apple has not signed (approved) the app yet, so macOS blocks it. Open System Settings, then Privacy & Security. Click Open Anyway.
    3. Use it from Finder. Right-click a data folder and choose Analyze with Cuvette.
    Download for Mac

    The command was ga before we renamed it cuvette. Until the new name is in the released version, type node bin/ga.js in the source folder. See all install methods.

    Ask a question about your data. Keep every decision.